

Juniper Zero Touch Provisioning
Zero Touch Provisioning installs or updates the software on your new Juniper Networks devices without you having to do anything. With Zero Touch Provisioning (ZTP) you can automatically provision new Juniper Networks devices in your network with very little manual interaction.
Zero Touch Provisioning automates the provisioning of new network switches. When you physically connect a switch to the network and boot it, it tries to upgrade the Junos OS software and download configuration files from the network. Request system zeroize on the switch you wish to provision to ensure it has the factory default configuration loaded.
The switch locates the required software image and configuration files on the network using DHCP information from a DHCP server. No DHCP server setup means the switch boots with preinstalled software and factory default configuration.
In this case study, I will discuss using Raspberry PI as FTP and DHCP server. I use a Raspberry PI 4 with 4GB ram, loaded with Raspbian OS. Also, you need access to the Juniper Networks support website to download the relevant software as per your Juniper box recommendation.
Raspberry PI 4 network interface configuration
The Raspberry PI has one ethernet port and one wireless connection. Ethernet is utilised to set up a DHCP interface for setting propagation, while Wi-Fi is simply used for management (remote access).
Below the different steps to the Raspberry PI 4 network interface configuration are explained. Download the configuration guide to do the setup yourself.
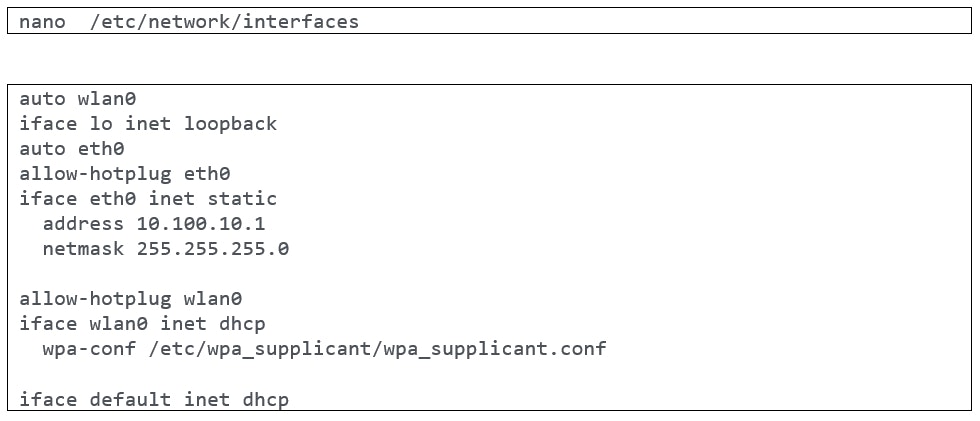
Step 1
We need to configure the ethernet interface on the Raspberry PI with static IP to be used as DHCP/FTP server IP address.

DHCP server configuration
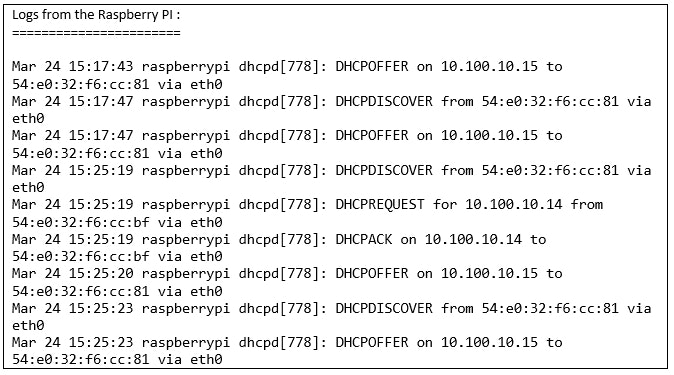
The DHCP server is in charge of allocating IP addresses to our EXs (e.g. ex switch). It sends instructions on how to upgrade the configuration file/software file (location of files on the FTP server), but can also be used to configure hostname, NTP, or DNS servers.
Step 2
Disable the preinstalled DHCP software on your Raspberry PI.


Step 3
Install the ISC-DHCP-server.


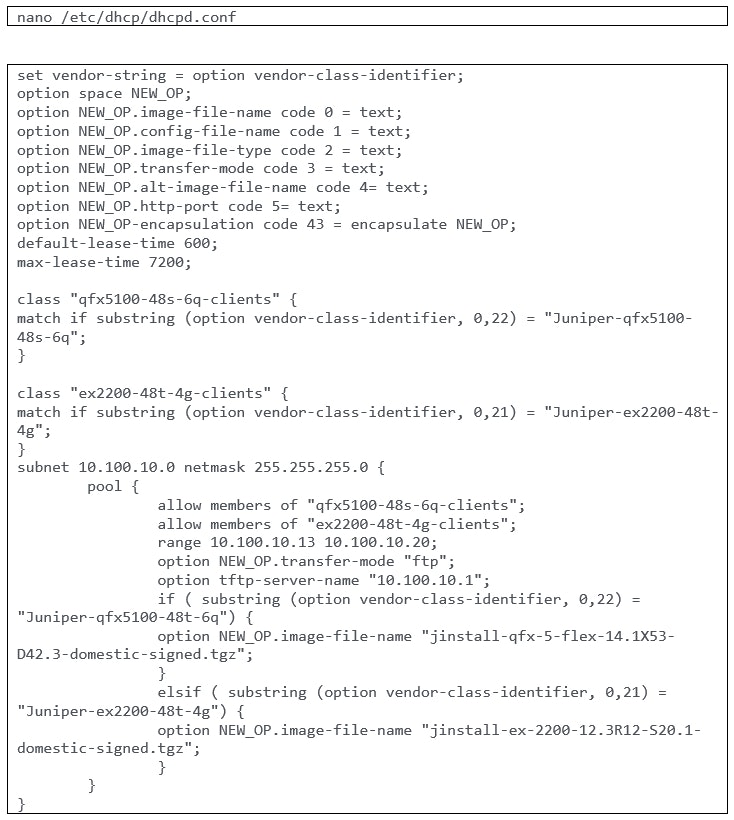
Step 4
Update the dhcp.conf file with the required configuration.

The DHCP server must then be started.


If the command input returns with no message, it was successful. If the ISC-DHCP server's startup was aborted due to an issue, you should run a status query to determine the exact cause of the error.


In the case of an error, the messages are unfortunately not always clear. Unless you made a configuration error. Typos or missing semicolons (";") at the end of a directive are very popular. The leases granted are recorded in a file.


FTP server configuration
The vsftpd software is available through the Raspbian regular repository. Run the commands below to install it.
Step 5
Install vsftpd.


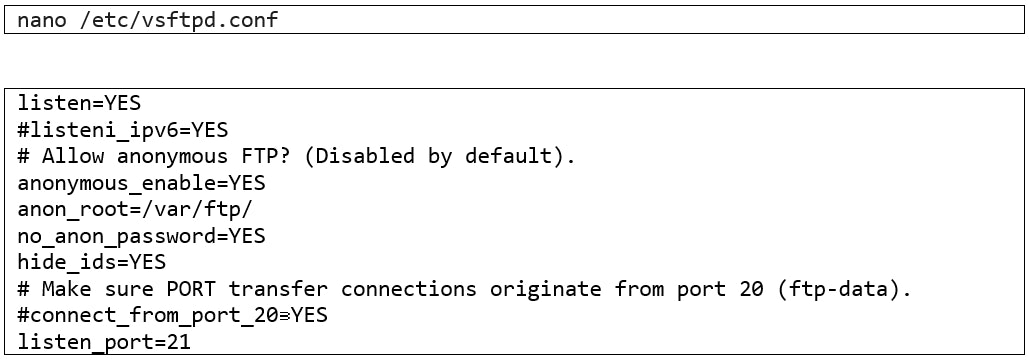
Step 6
Update the vsftpd.conf file with the required configuration.

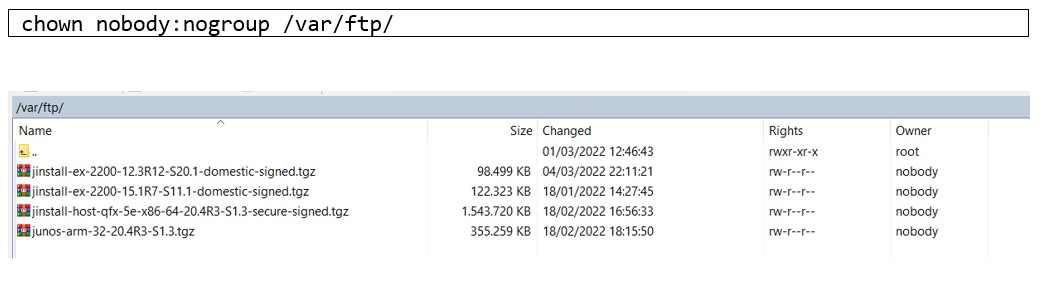
Notes: For files that are stored on the Raspberry PI /var/ftp, you may need to change the ownership after you transfer the images.

Now let the magic begin
Connect the Raspberry PI to the targeted switch through the management interface.

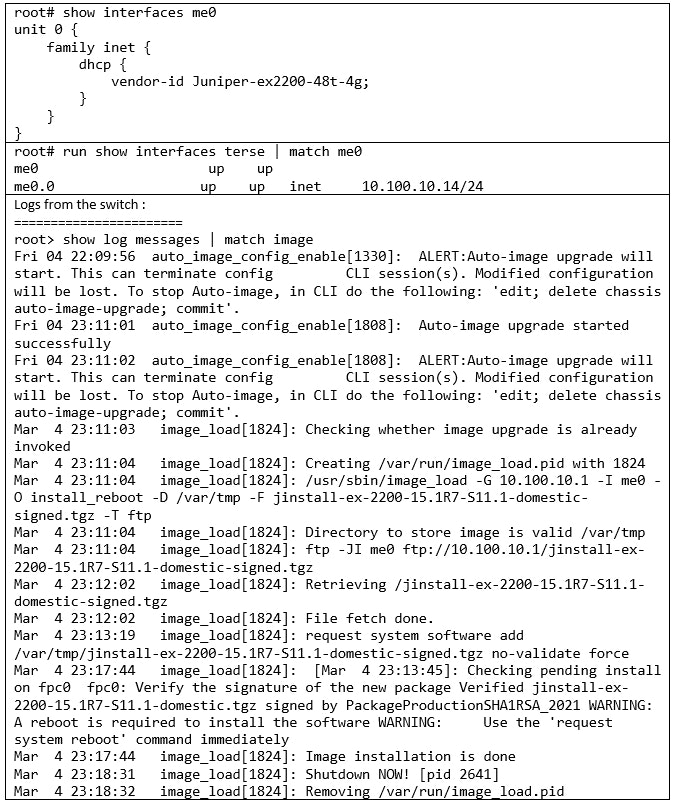

Following this process, the switch will boot with the new software and configuration applied, also the “set chassis auto-image-upgrade” statement will be removed by the ZTP process.
ZTP helps you to save resources
Using ZTP will help you to provision multiple switches at the same. This saves time by shortening the amount of time it takes to get the switches up and running, it saves costs by lowering the number of resources required to finalise the tasks and reduces human error.
Do you want to know more about this topic?
Our experts and sales teams are at your service. Leave your contact information and we will get back to you shortly.